What Command Can Be Used to Repair a Dual Boot System
If your dual kick organisation does not show the operating organization selection carte du jour or the Windows Boot Manager while booting upwards, yous are not alone. A missing dual boot option is common on newly created dual boot systems, mainly caused by an incorrectly configured boot director.
Fortunately, you tin can set up this issue by tweaking a few Windows settings. And so, hither are a few ways to gear up the missing dual kicking menu on your Windows system.
Why Am I Non Seeing a Dual Boot Option in Windows 10?
The dual kick pick or the Windows Kicking Manager during restart may not show for several reasons. Some common causes for this include:
- The kicking bill of fare is not activated.
- Systems with fast startup enabled may kick directly into the default OS without offer any boot options.
- The default operating system in Startup and Recovery may be incorrectly configured.
- Some corrupted system files are causing the boot manager to malfunction.
As such, you have recently set up a dual boot system, but yous can't see the option to change operating systems, follow these steps in Windows x.
1. Enable the Boot Menu Using Command Prompt
If the boot card has been disabled somehow, you won't see the dual boot option announced. The kicking card can go deactivated after upgrading to the latest version of the Bone.
Fortunately, you can employ the Windows command processor to enable the boot menu.
To enable the kick carte using the Control Prompt:
- Type cmd in the Windows search bar, right-click on the Command Prompt, and select Run as Ambassador.
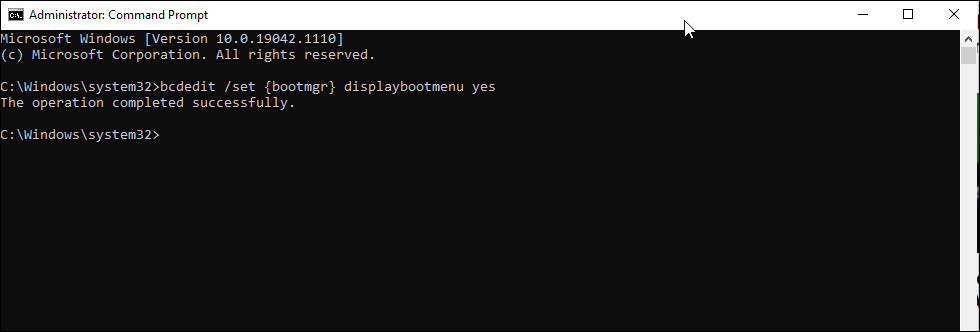
- In the Control Prompt window, type the command listed beneath and hit the Enter key. If possible, copy and paste the control to avert the non recognized every bit an internal command error.
bcdedit /fix {bootmgr} displaybootmenu yes - Upon successful execution, you volition see the operation completed successfully message.
If you're curious as to what you've only run, BCDEdit is a control-line-based utility to manage BCD (Boot Configuration Data). When executed, information technology changes the kicking configuration and activates the boot menu.
If you want to deactivate or hide the boot card, open the Command Prompt as admin and enter the following command:
bcdedit /fix {bootmgr} displaybootmenu no Once executed, your system volition boot into the set default OS without showing the dual boot option.
2. Configure the Default Operating System in Startup and Recovery
Windows ten'south Advanced System Settings window allows y'all to select the default operating system to boot into. Information technology can also display a list of operating systems and recovery options during a restart.
Configuring these settings can help you gear up a missing dual kick pick in Windows 10.
To configure the default operating organization in Windows 10:
- Printing Win + I to open Settings.
- Then, go to System and open up the About tab from the left pane.
- Scroll down to the Related settings section and click on Advanced system settings. On older Windows x computers, go to Control Panel > Organisation and Security and click on Advanced system settings from the left pane.
- In the System Properties window that appears, locate the Startup and Recovery department and click the Settings push.
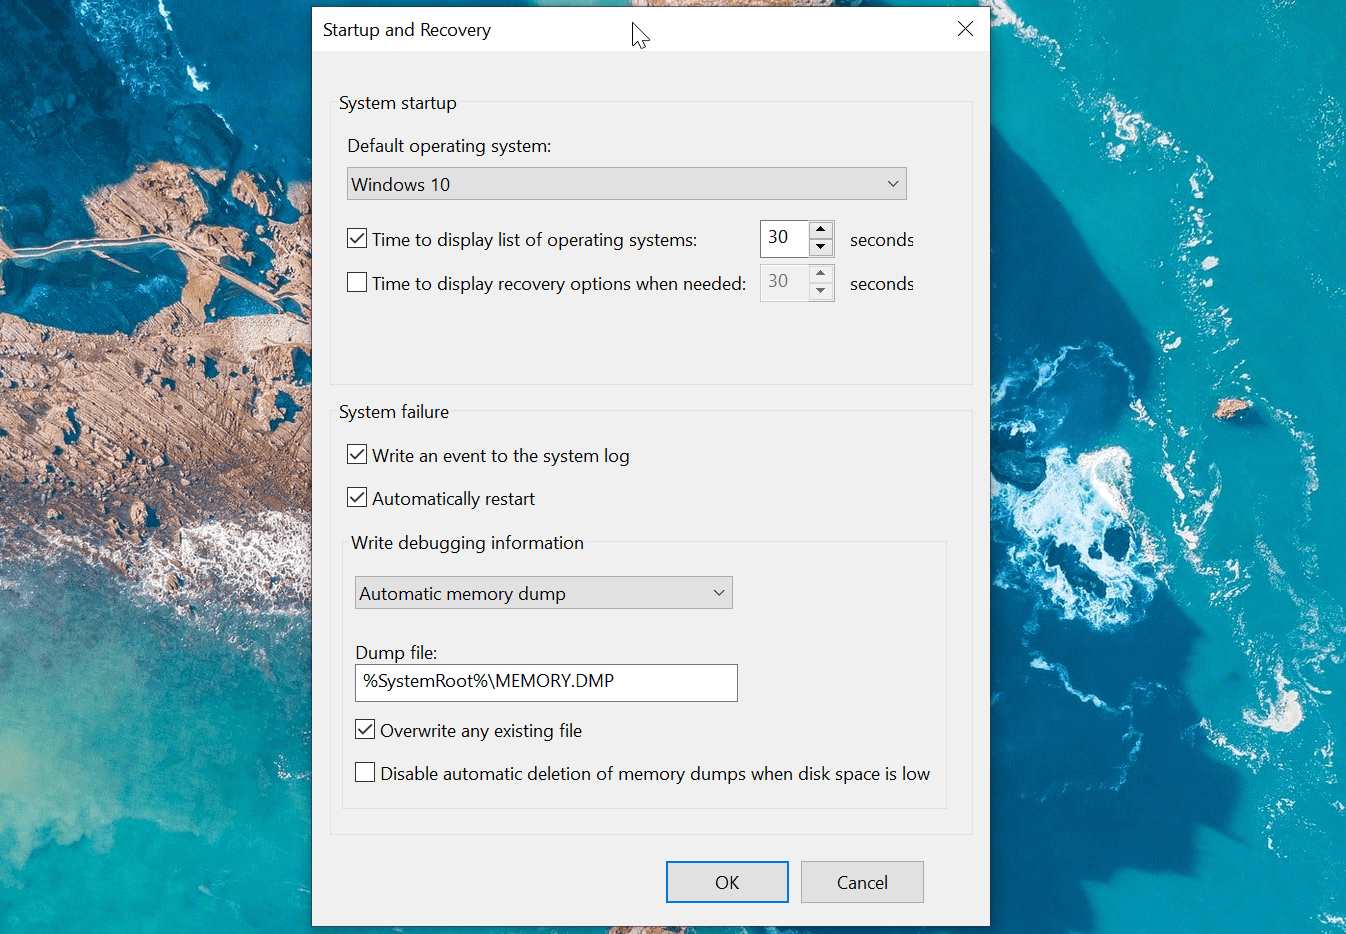
- In the Startup and Recovery window, click the drib-down for Default operating system and choose your preferred Bone.
- Adjacent, check the Time to display list of operating systems option and set it to 30 seconds. This setting means your computer volition show the boot card for xxx seconds. Once this fourth dimension elapses, it volition load the operating organization yous selected every bit default.
- Click OK to salvage the changes.
Restart your computer and wait for the kicking menu to announced. Next, choose your preferred OS using the arrow primal and hitting the Enter key. If you don't make any selection before 30 seconds, your computer volition load the ready default OS.
3. Configure the Boot Manager With EasyBCD
Sometimes, the bcdedit control won't piece of work. It either fails to actuate the kicking menu or will not work fifty-fifty after displaying the success message.
In this situation, you lot tin use a third-party utility called EasyBCD to add a kicking entry. EasyBCD is a lightweight program for the Windows platform and free to utilise for not-commercial purposes.
To add boot entry using EasyBCD:
- Go to the Neosmart EasyBCD folio and click on Run across More.
- EasyBCD is bachelor in Commercial and Not-commercial versions. Click on Register for downloading the free version and then enter an email accost and username to download the tool.
- Run the installer and expect for the app to end installing on your figurer.
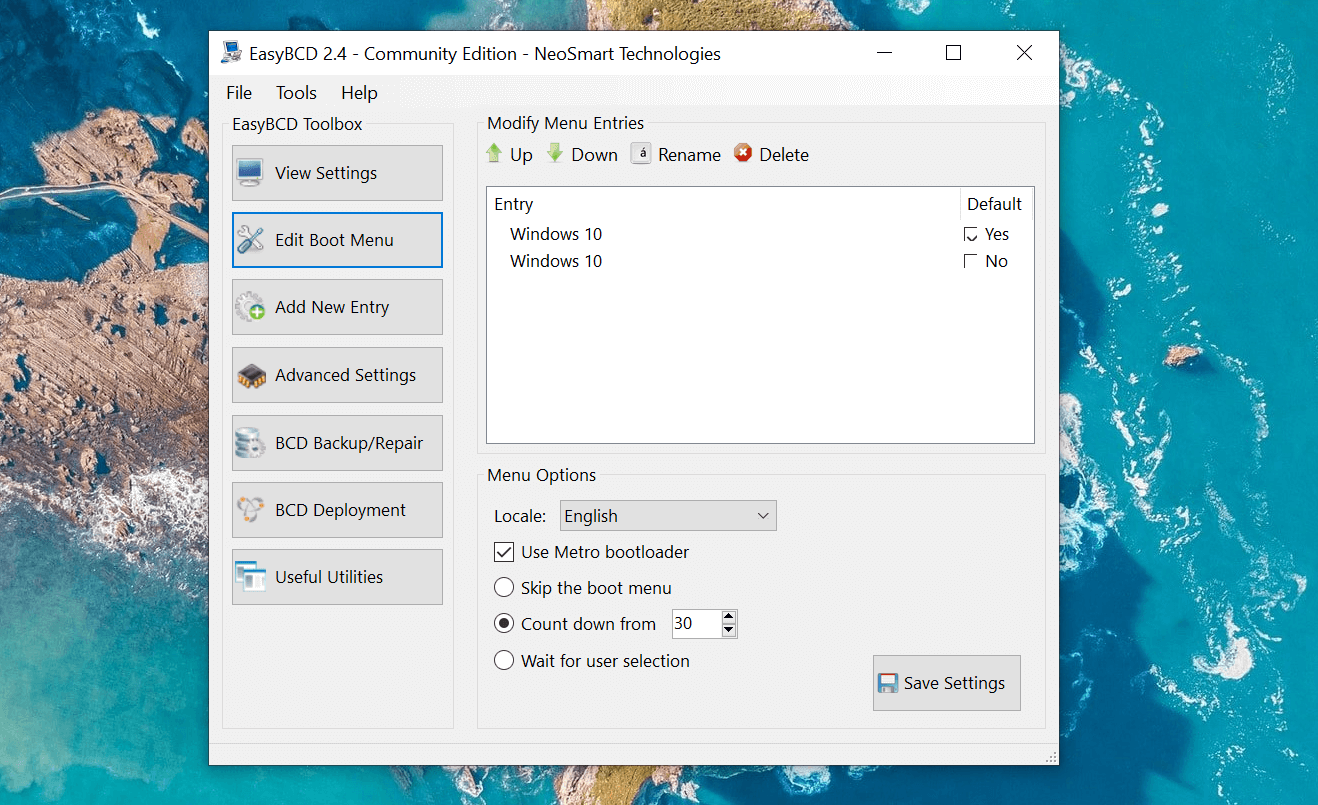
- Launch EasyBCD and click on the Edit Kick Menu push.
- Hither y'all volition see a dual kick entry listed by default. If y'all desire to modify the default Bone, tick the box under the Default column for the entry you want to set as default.
- Under Menu Options, bank check the Use Metro bootloader option.
- Select Count down from and set it to 30 seconds.
- Click Relieve Settings, and you volition run across the Bootloader settings saved successfully message.
Close EasyBCD and restart your PC. During restart, you will see the kick carte with a dual boot selection. If the option is nevertheless not showing, boot into Windows and launch EasyBCD. Repeat steps 4-8 once more and restart your calculator.
4. Disable the Windows Fast Startup Feature
The Fast Startup feature in Windows x helps you restart your PC faster after shutdown. When enabled, it saves your operating organization to a hibernation file that speeds up the boot process. It is a handy feature to take on older systems, especially if your organisation takes all the time in the world to restart.
However, it has some disadvantages as well. When Fast Startup is enabled, Windows locks the installation drive. Equally a result, Windows may neglect to recognize the OS on a dual-boot configured organization.
To disable fast startup, practise the following:
- Printing Win + R to open the Run dialog box. Blazon control and click OK to open up the Control Console.
- In the Command Console, go to System and Security > Power Options.
- In the right pane, click on Choose what the ability buttons do.
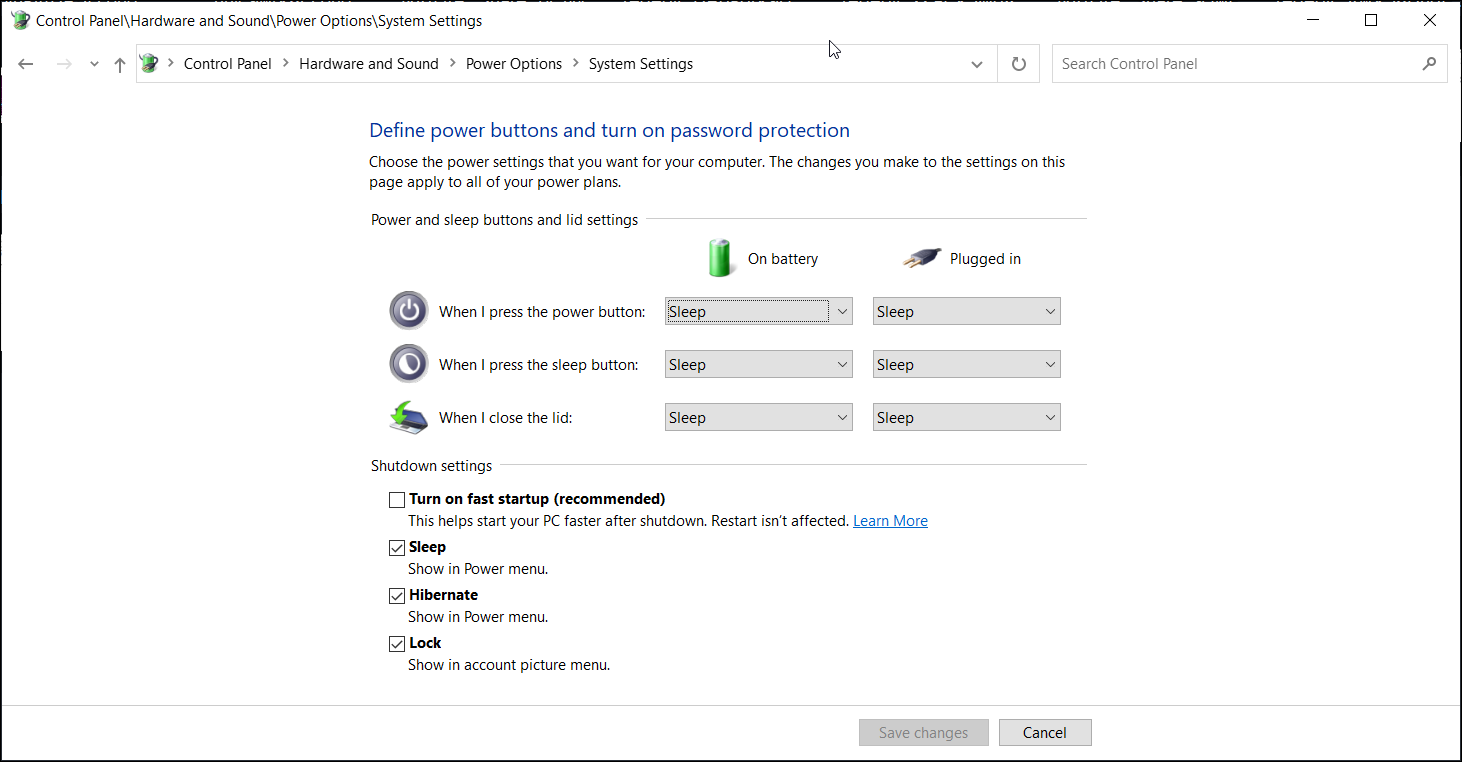
- Click on Change settings that are currently unavailable. At present you volition exist able to admission the greyed-out Shutdown settings.
- Uncheck the Plough on fast startup (recommended) option.
- Click on Save changes to turn off fast startup in Windows.
Once successfully disabled, restart your PC and wait for the dual boot pick to appear.
Whether y'all want to dual boot Windows 11 with Windows 10 or an older version of Microsoft'south operating system, the boot menu is a critical attribute of any dual boot process. Boot configuration tools such every bit the BCDEdit and EasyBCD can help you lot troubleshoot the boot menu missing effect without having to reinstall the OS again.
About The Author

Source: https://www.makeuseof.com/windows-10-dual-boot-option-not-showing/
0 Response to "What Command Can Be Used to Repair a Dual Boot System"
Post a Comment